
Revit Facade Basics: A Step-by-Step Guide to Your First Curtain Wall
Welcome to the exciting world of Revit facade design! If you're just starting your journey with Building Information Modeling (BIM), creating your first curtain wall can seem a little daunting. But don't worry! This step-by-step guide will walk you through the fundamental process, helping you build a glazed facade in Revit with confidence. We'll cover the basics of using Revit's curtain wall tools, setting up grids, and incorporating panels – all while keeping facade revit glazing design principles in mind.
What is a Curtain Wall?
Before we dive in, let's understand what a curtain wall actually is. In architectural terms, a curtain wall is a non-structural outer covering of a building. It's designed to protect the interior from the elements (like rain and wind) and often features significant amounts of glazing. Revit's curtain wall tools are specifically designed to model these types of facades efficiently.
Step 1: Selecting the Curtain Wall Tool
First things first, open your Revit project. Navigate to the Architecture tab on the Revit ribbon. In the Build panel, you'll find the Wall tool. Click the dropdown arrow below it and select Curtain Wall.
Step 2: Drawing Your Curtain Wall
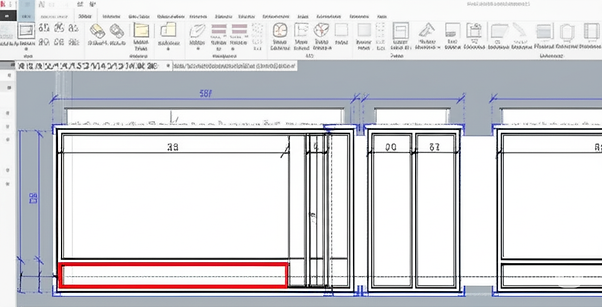
Now that you have the Curtain Wall tool selected, you can start drawing the outline of your facade. Just like drawing a regular wall, you can use the various draw options available in the Modify | Place Curtain Wall tab (Line, Rectangle, Polygon, etc.).
Click to define the start point of your curtain wall and then click again to define the end point. The length and shape will depend on your design. Don't worry about the exact placement or height right now; you can adjust these later using the properties palette.
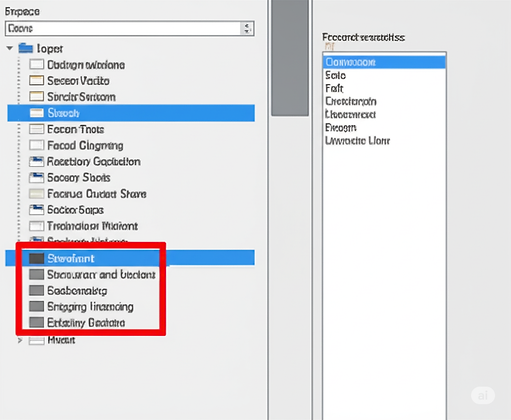
Step 3: Understanding Curtain Wall Types
Revit offers different types of curtain walls. In the Properties palette (usually on your left), you'll see a type selector. The three default options are:
-
Curtain Wall: A basic curtain wall without predefined grids or mullions. You have full control over the grid layout.
-
Exterior Glazing: This type comes with a predefined grid and glazing panels. It's a good starting point for a simple glazing design.
-
Storefront: This type includes a predefined grid, glazing panels, and mullions (the vertical and horizontal framing elements).
For this basic tutorial, let's start with Exterior Glazing. Select this type from the dropdown menu.
Step 4: Exploring the Basic Glazed Facade
Now, switch to a 3D view to see the curtain wall you've created. You should see a wall with a grid pattern and glass panels (the glazing). This default glazing design provides a basic framework.
Step 5: Adjusting Curtain Grids (Optional)
The predefined grid in the "Exterior Glazing" type might not always suit your design. You can easily adjust it or add more grids.
-
Select the curtain wall.
-
Go to the Modify | Curtain Walls tab.
-
In the Layout panel, click Curtain Grid.
Now you have options to place horizontal or vertical grids. Hover your cursor over an existing horizontal or vertical edge of a panel. Revit will show a temporary line indicating where the new grid will be placed. Click to place the grid. You can adjust the spacing of these grids by selecting them and editing their dimensions. This allows you to customize the pattern of your facade glazing.
Step 6: Adding Mullions (Optional)
Mullions are the structural elements that hold the glazing panels in place. The "Exterior Glazing" type already has basic mullions. If you started with a "Curtain Wall" type or want to modify the existing mullions:
-
Go to the Architecture tab.
-
In the Build panel, click the dropdown arrow below Wall again, and this time, select Mullion.
In the Modify | Place Mullion tab, you can choose different mullion profiles from the Type Selector. Then, you have options to place mullions:
-
Grid Line Segment: Click on a segment of a curtain grid to place a mullion.
-
Grid Line: Click on an entire curtain grid line (horizontal or vertical) to place mullions along its whole length.
-
All Grid Lines: Click on the curtain wall to place mullions on all grid lines.
Experiment with different mullion types to achieve your desired aesthetic for your revit glazing design.
Step 7: Understanding Curtain Panels (Glazing)
The panels within your curtain wall are what typically define the glazing aspect of your facade revit design. In the "Exterior Glazing" type, these are automatically assigned as glass panels.
If you want to change the panel type (e.g., to a solid panel or a different type of glass):
-
Hover your cursor over a panel in the 3D view and press the Tab key until the individual panel is highlighted.
-
Click to select the panel.
-
In the Properties palette, you can change the panel type from the Type Selector. Revit has various system panel types available, and you can also create your own custom panel families for more specific glazing or solid facade elements.
Congratulations! You've now taken your first steps in creating a curtain wall facade in Revit. This guide has covered the basic tools and concepts needed to model a fundamental glazed facade. Remember to experiment with different curtain wall types, grid layouts, mullion profiles, and panel materials to explore various facade revit glazing design possibilities.

.png)
.png)
.png)
.png)
.png)
.png)